

Hydraulics and Pneumatics are great topics to teach children. First of all both words sound very impressive and when the children learn these words they will sound very important and knowledgeable if they use them. Also, hydraulics and pneumatics are used in many machines and in many everyday applications, therefore it is easy to show the importance of understanding these topics. One can easily show and explain the difference between hydraulics and pneumatics – a great “Compare and Contrast” analysis. Thirdly, there are many fun and impressive experiments that can be done with hydraulics and pneumatics in a very inexpensive way, with very accessible materials. And finally, since hydraulics and pneumatics is so useful, there can be multiple projects that children can actually build themselves. Thus weaker students and stronger science students can both do projects, yet with differing complexity. Here are some of the techniques I use in order to teach hydraulics and pneumatics to children:
1. FLUID PRESSURE: Hydraulics and Pneumatics for me is a culmination of a study of Fluids. Therefore, before I talk about hydraulics and pneumatics, I must talk about Fluid Pressure.
I start with a discussion of Pressure in general, it’s formula, the units.
Pressure: The measure of the force acting perpendicular to a unit area.
(Here I demonstrate pushing with finger compared to pushing with a whole hand against a wall, book, child volunteer from the class, with the same force. Since the children already have a good understanding of force, they can see that pressure is very similar to force, but spread out over an area – therefore the smaller the area it’s spread out, the more concentrated the force is, and vice versa.)
Formula: P = F/A
(Even though children might not be ready to understand formulas yet, I like to introduce formulas to even the youngest children, so they start to see the relevance of math, and formulas in science. I explain that the formula pretty much means the same thing as the definition above – Force spread over an area. This is useless for the weaker students, but will get the stronger science students thinking about the relationship between formulas and definitions… excellent for planting the seed for future physicists and engineers.)
Units: (from the formula N/m2) or Pa (pascals), kPa (kilopascals), 1kPa = 1000Pa
(I definitely talk about units whenever I introduce a new concept. I talk about where the units come from – starting with the formula: Force over area, force is measured in Newtons, area is measured in m squared. This is a great way to engage students, asking them for answers, leading them to the solution. Then I mention that instead of using two units, scientists decided to invent one unit to denote this relationship: Pa – after a well known scientist Pascal. And another great discussion point comes up when I talk about kPa and how it’s related, just like g and kg or m and km. Lots of stuff to talk about here. Sometimes I even get the students to do research on who Pascal was, and why the pressure unit was named after him).
If force increases –> pressure increases
If area increases –> pressure decreases
(These statements are critical to mention and discuss in detail. This can be explained again with the pushing of a student with a whole hand compared to a finger. Or even talking about or demonstrating walking barefoot on a plank of 100 nails compared to walking onto one nail. Making such a plank of wood with many nails sticking out of it and keeping it for future classes is a good idea and when used to demonstrate this concept is very visual as well as dramatic – a good way to keep students engaged and to remember this concept. You can also use the example and demonstrate walking on many eggs at once compared to walking on just one egg. If you have access to a projector in the classroom, there are many YouTube videos showing people walking on eggs, and not breaking them (here’s a link to a good one: http://www.youtube.com/watch?v=LszleCrvFyQ )If you don’t want to spend a whole class on this concept, you can just quickly talk about some of these examples, getting some input from students, and continue.)
Next I talk about pressure of fluids (fluids, by the way, are materials that flow like liquids and gases)
Fluid Pressure: Exerted in all directions equally
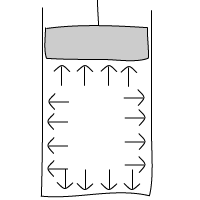
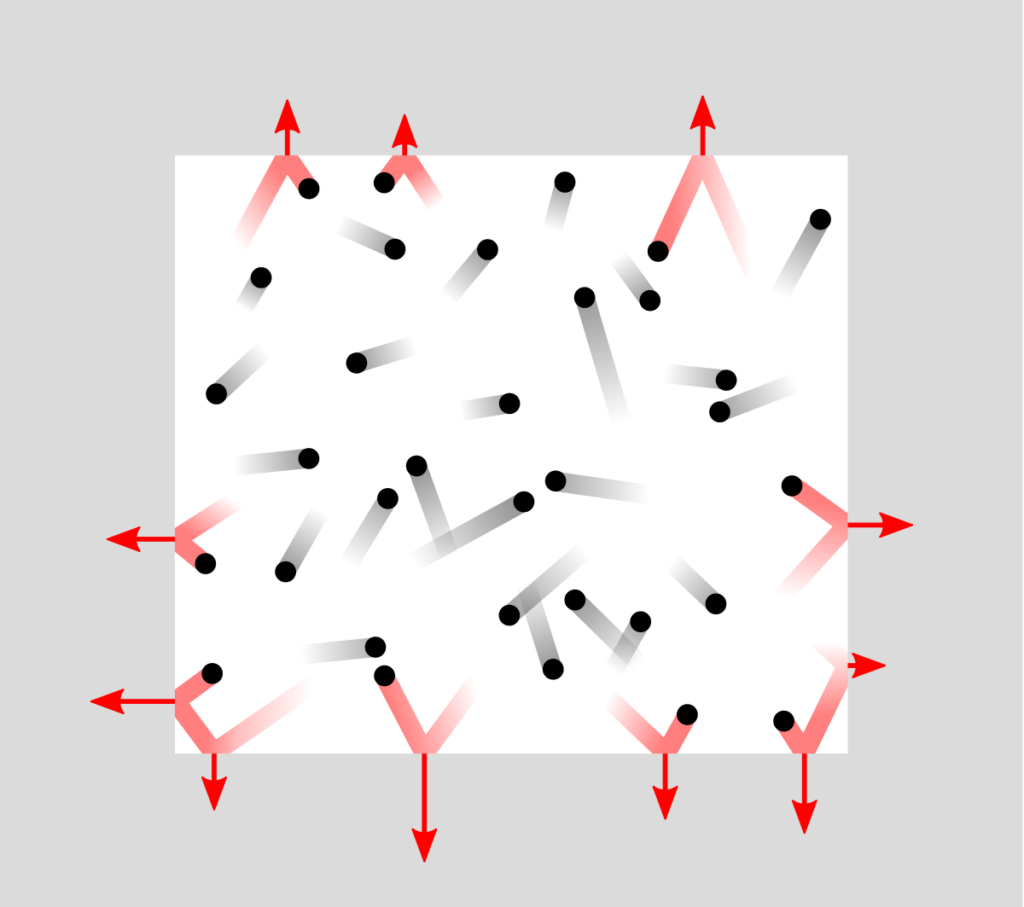
(I make sure to use many diagrams and as few words as possible in my notes. Students learn, understand and remember pictures so much better than a sentence.)
Confined Fluids:
– any fluid in a closed system
– the fluids can move around within the system, but cannot leave or enter the system examples:
– blood moving through the body
– air moving in an air mattress
(A discussion of confined fluids is essential before starting a discussion of hydraulics and pneumatics. Also as many examples as possible makes the concepts applicable and less foreign to the children. Examples taken from the students themselves are even better, as the learning is less passive and more active at this point.)
Gases
- very compressible
- because the gas particles are very spread out
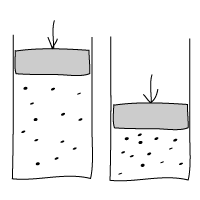
Liquids
- are not compressible
- the particles in a liquid are not as spread out as in a gas
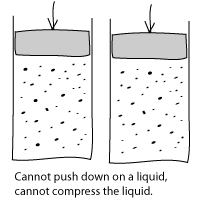
(Here I would call on a demonstration or experiment of this. You could do many things; some examples: take a syringe, fill it with air, and then cover the open end with your finger. Show that the air can be compressed by pushing down on the plunger. Let the students do this, so that they see it is not some sort of trick. Then fill in the syringe with water. Again covering the end with your finger, show that now you cannot compress the water with all your might. Try very very hard to make sure they see your effort. Get students to replicate this. This also makes for a great whole class experiment / activity. Make sure you think of some interesting questions and then get the students to experiment / fool around with syringes filled with air and water. Watch out, because when I did this, lots of the time, the students ended up having a water fight with the syringes – not really a big deal if contained to the classroom though)
Examples of questions for a lab:
If you fill in the syringe with 20mL of air, to what volume can you compress it?
If you fill in the syringe with 20mL of water, to what volume can you compress it?
What is the difference between compressing air and water?
Attach two syringes with some tubing with air in the confined system. What happens when you press on the plunger?
Attach two syringes with some tubing with water in the confined system. What happens when you press on the plunger?
Attach three syringes (two of the same size, and one larger) with some tubing and a T-valve. What happens when you press on one plunger?
Attach three syringes with some tubing and a one way valve. What happens when you press on one plunger?
(Lots of things happening here. The students start getting a feel for hydraulics and pneumatics. They realize that in hydraulics there is no delay, and the force is passed on instantly to the other syringe, while in pneumatics there is a delay of action because of the compressiblity of gases. Then you can introduce the valves – T intersection, one way valve, etc. This shows the children different ways of controlling the flow of fluids. Make sure you relate the valves to something they are familiar with, like a tap in a bathtub, etc.)
2. HYDRAULICS AND PNEUMATICS: Once the children understand pressure and get their feet wet with syringes and pressure of fluids (gases compared with liquids, etc.) they are ready for hydraulics and pneumatics. I jump right in by making a huge table, comparing Hydraulics to Pneumatics:

(As I write this table, and get the children to copy it, I have a class discussion every step of the way, along with demonstrations of hydraulics: the two syringes with water inside them- when you push on one plunger, the other plunger moves… this can be used to lift an object – the basic principle of hydraulics! and pneumatics: two syringes joined together with some tubing, with air inside them. When press down on one syringe, the other piston lifts. By this point, student really start to understand what hydraulics and pneumatics is about and how it can be used.)
3. HYDRAULICS LIFT: This is an important part of hydraulics. There is many explanations online of the hydraulics lift, how it works and pictures of it, so I won’t get into that (check out http://hyperphysics.phy-astr.gsu.edu/Hbase/pasc.html). But it is important to explain to the children that a small force can be used to lift a large object (such as a car) – of course there is a trade-off: the large object goes up just a very small distance, while the force acting on the smaller piston, using a smaller force, has to go through a larger distance. This is why hydraulics is so useful. I would spend at least a class, if not two to go over this concept and do some experiments with it (two syringes, one small, one large connected with some tubing, along with some weights, small and large, etc.
4. PROJECT: I then jump in here with a project, where the students must build a hydraulic or pneumatic model of a machine.
If you want to get a start up kit for a demo or more help, try some of these:
- Pathfinders Hydraulic Machines 4-in-1 Wooden Kit (Cherry Picker, Platform Lifter, Excavator, Scissor Lift)
- CIC Kits CIC21-632 Hydraulic Arm Edge
- Thames & Kosmos Simple Machines Science Experiment & Model Building Kit, Introduction to Mechanical Physics, Build 26 Models to Investigate The 6 Classic Simple Machines